The crochet diamond stitch bag is a captivating creation that beautifully combines sophistication with functionality.
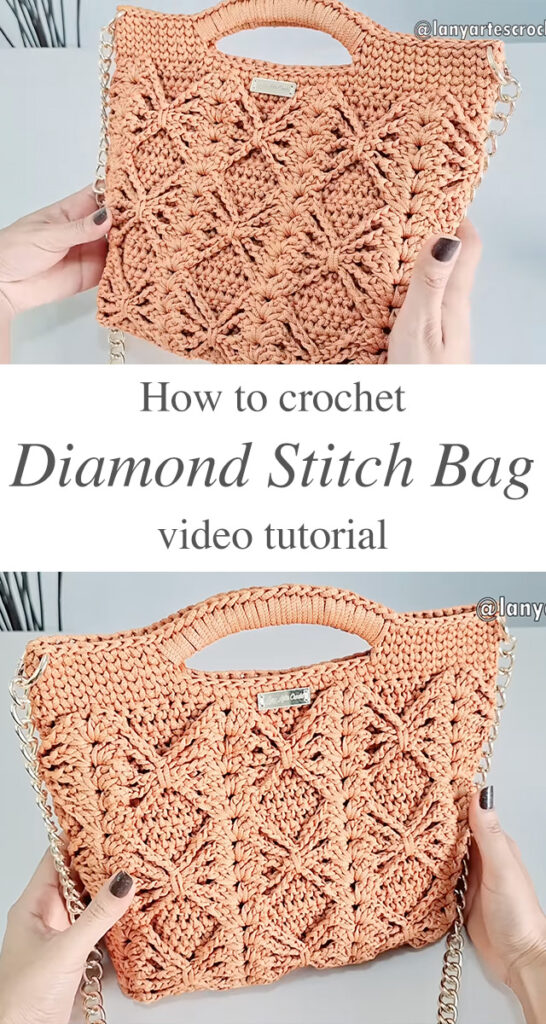
THE CROCHET DIAMOND STITCH BAG
The diamond stitch is a true gem in the crochet world, celebrated for its intricate design and rich texture. When incorporated into a bag, it forms a stunning three-dimensional diamond pattern that brings sophistication and charm to any creation. The interlocking design provides a refined, artisan-quality finish, making the diamond stitch bag a standout piece. Though it appears intricate, this stitch can be mastered with patience and practice, making it a rewarding choice for crocheters looking to elevate their skills.
For a step-by-step visual guide, watch this video tutorial that clearly explains the pattern in detail.
Materials You’ll Need
To start, you’ll need some specific materials to make your crochet diamond stitch bag. It is used 300 M polypropylene nautical thread 3 mm, which is especially important for bags. Opt for a medium to thick yarn that holds the diamond stitch pattern well. A crochet hook size appropriate for your yarn is also essential—most patterns recommend a 3.50mm hook, depending on your preference for bag stiffness.
Step-by-Step Process to Crochet Your Bag
1. The Foundation Chain and Base:
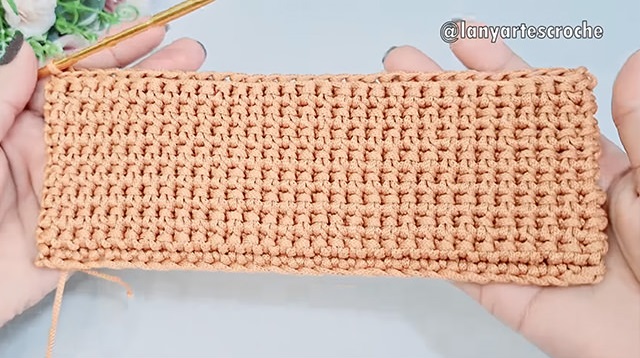
Each bag begins with a sturdy foundation. Start by crafting the base with a simple chain and single crochet stitches, ensuring a strong structure to support the intricate diamond stitch pattern. Typically, a rectangular base is ideal for most designs, but feel free to adjust the dimensions to suit your needs.
2. Introducing the Diamond Stitch:
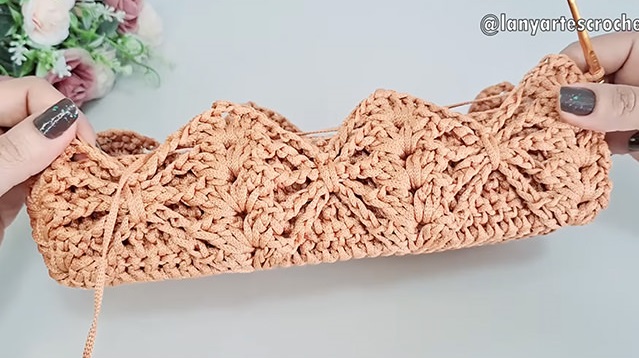
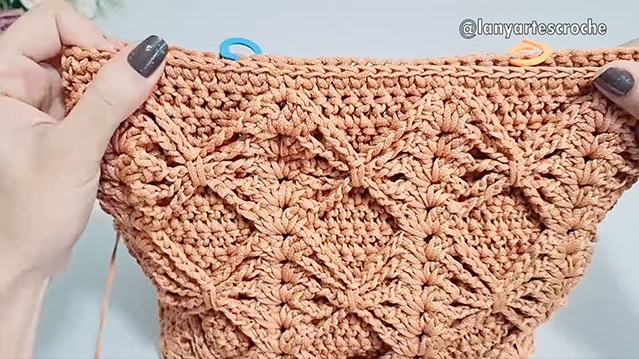
After completing the base, you’ll move on to crafting the diamond stitch. This stage involves alternating rows of double crochet stitches with front post stitches to shape the intricate “diamond” pattern. The interplay of these stitches produces a striking textured effect, where each diamond pops beautifully against the bag’s smooth backdrop.
The stitch pattern might seem challenging initially, but once you find your rhythm, it comes together effortlessly. Accurate counting is essential to maintain evenly spaced diamonds, giving the bag a polished and symmetrical appearance.
3. Forming the Bag’s Body:
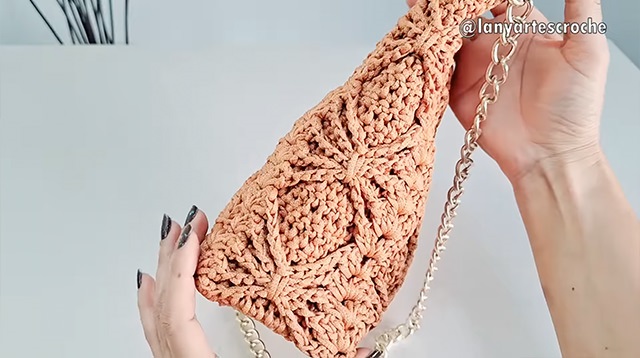
With each added row of diamond stitch, your bag gradually takes form, revealing a striking, textured pattern as the diamonds become more pronounced. Adjust the number of rows based on your desired size—fewer rows for a compact handbag or additional rows for a spacious tote.
4. Adding Handles and Finishing Touches:
After finishing the body of your crochet diamond stitch bag, it’s time to add the handles. You can either crochet custom handles or attach pre-made ones made of metal, wood, or fabric to suit your style. For a more refined touch, consider lining the interior of your bag with fabric. While optional, this step enhances durability and gives your bag a professional finish.
Personalizing Your Crochet Diamond Stitch Bag
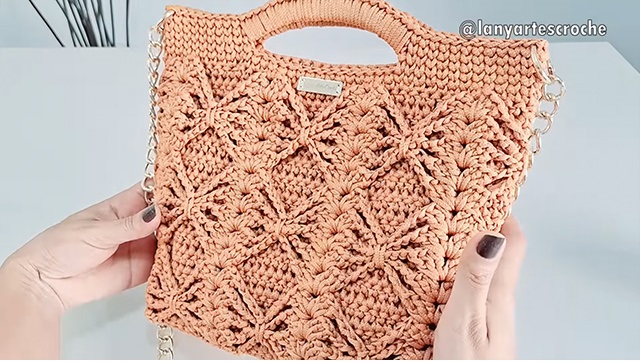
Creating your own crochet diamond stitch bag offers the exciting opportunity to customize it to your taste. Experiment with various yarn colors to reflect your style—soft neutrals such as beige or gray lend a classic and versatile appeal, while vibrant shades like coral or mustard inject a playful, contemporary vibe.
To add a touch of sophistication, upgrade your bag with a metal chain strap or a sleek zipper closure. These enhancements transform a basic crochet design into a chic, high-end accessory. Additionally, incorporating a lining in a contrasting fabric can elevate the interior, making it just as stunning as the exterior.
In conclusion, the crochet diamond stitch bag is an ideal project for anyone looking to create a chic, functional accessory with a beautiful texture. With just a bit of time, some yarn, and the right tools, you can make a bag that’s not only stylish but also a reflection of your crochet skills. So, grab your hook, and let your creativity shine through this wonderful project!
Tutorial and photos of this bag by: Lany Artes Crochê.


